
Guide
Adding Soli to your website
Put your private contact form, booking page and website chat on your practice website. It takes a snippet and a few minutes.
- 5 steps
- A few minutes
- Updated Oct 2026
Step 1: Approve your website
In Soli, add your website’s address to your practice’s approved websites. Forms and chat only run on sites you approve, so nobody can copy your form onto another page.
Your plan sets how many websites you can approve: 2 on Solo, 3 on Practice and 5 on Clinic.
Step 2: Add a form
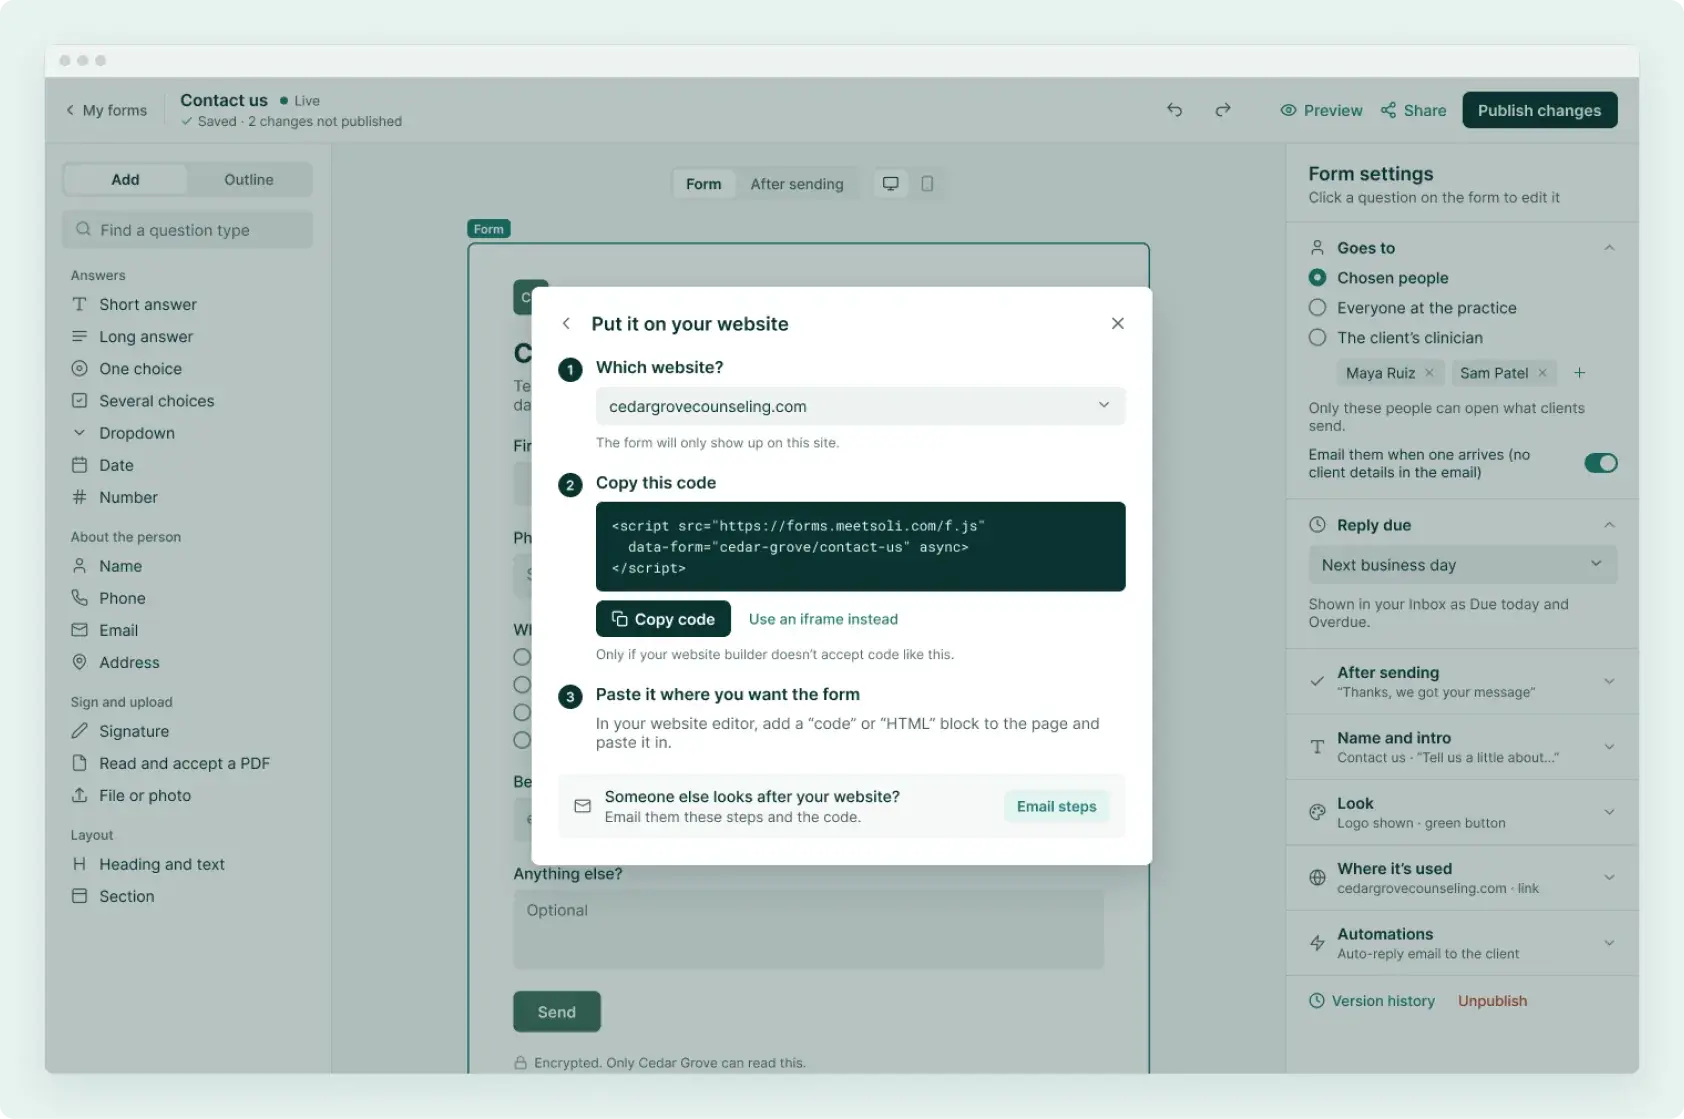
Open the form in Soli and copy its embed code, then paste it where the form should appear. You can also share the form as a link, for example from a “Get in touch” button.
- Squarespace
- Add a Code block to the page and paste the snippet.
- Wix
- Add an Embed HTML element and paste the snippet.
- WordPress
- Add a Custom HTML block and paste the snippet.
- Any other site
- Paste it into the page’s HTML where the form should go.
Step 3: Add your booking page
Set your booking hours and appointment types in Soli, then link to your booking page from your site, for example from a “Book a first visit” button.
Step 4: Add website chat
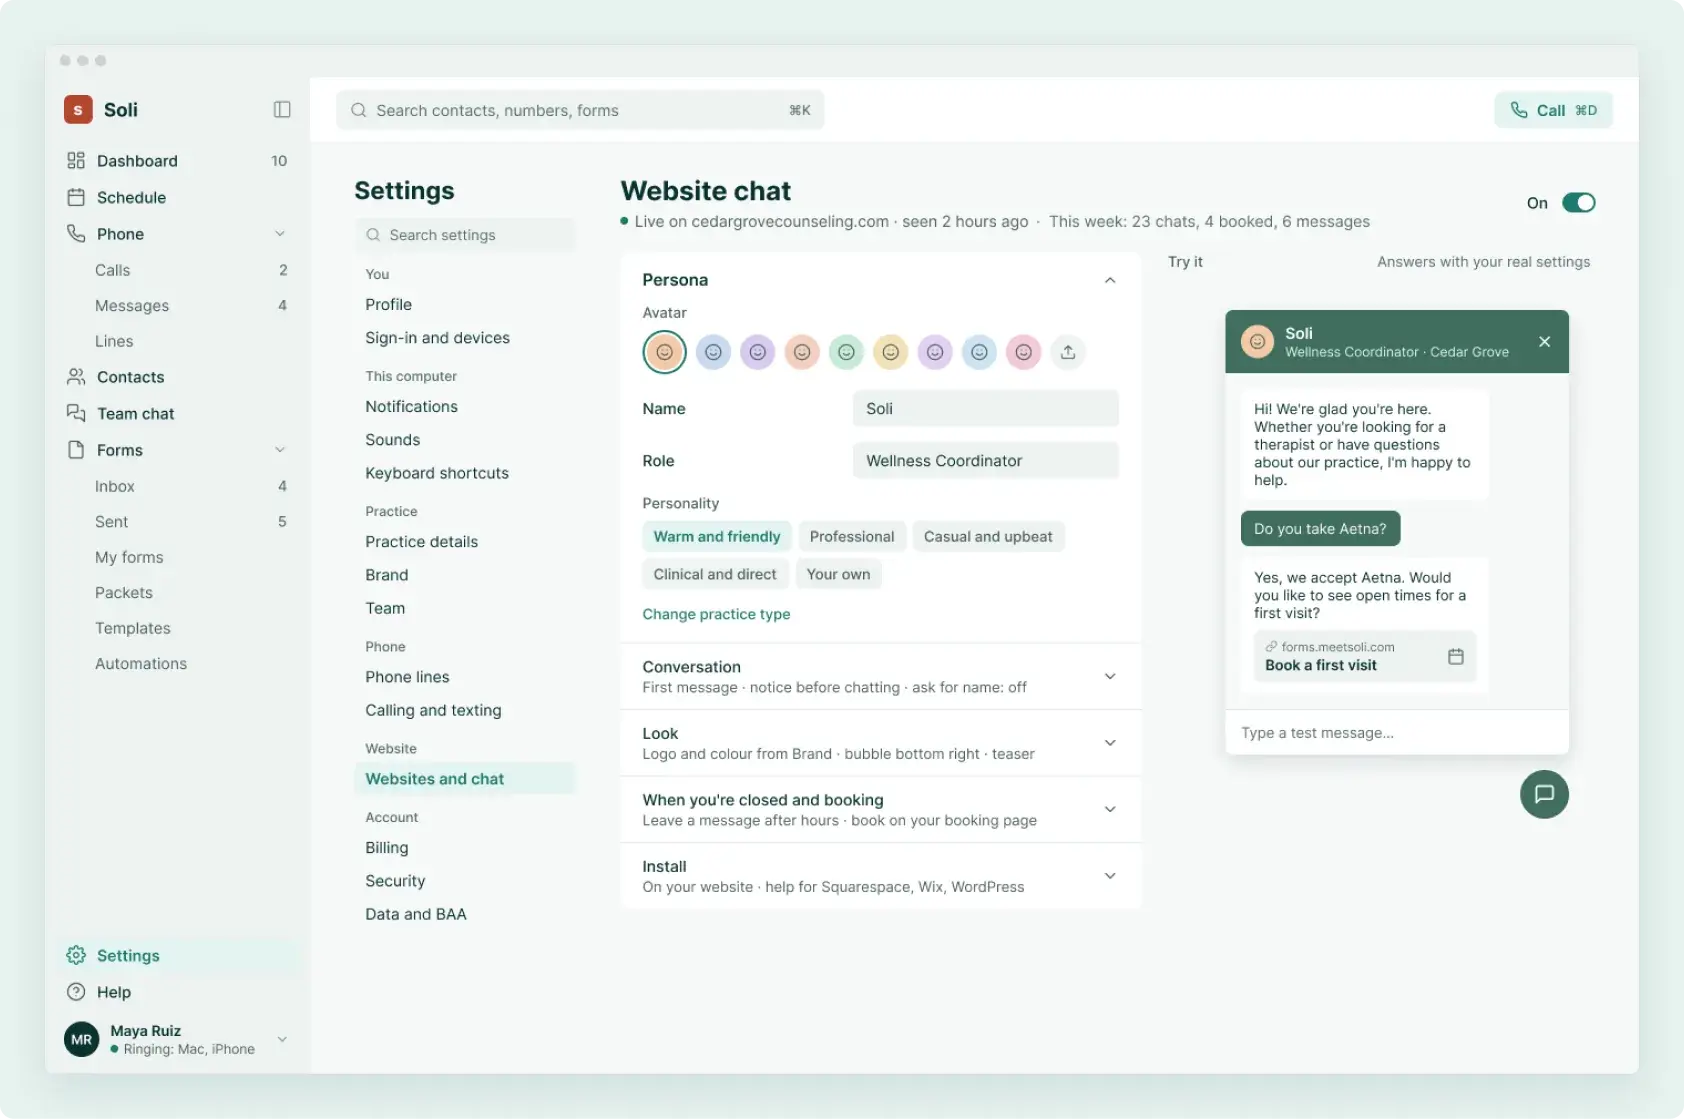
Write your practice facts in Soli: hours, location, fees, insurance and the questions people ask most. Then copy the chat snippet and paste it into your site’s header or footer settings so it appears on every page.
 How website chat works
Step 5: Check it
Open your website on your phone, send a test message through the form, and ask the chat a question. The form should arrive in your Soli inbox within moments.
Need a hand?
Email support@meetsoli.com and we’ll walk you through any step.